Some time ago I wrote a couple
blog posts about working with Log images in Photoshop and how you can convert them to 32-bit linear for saving out as OpenEXR. It involves a little bit of Photoshop trickery unfortunately, but it works and you can set up actions and scripts to do it in one step, which I'd recommend.
One oversight on my part, however, was not describing how to go from 32-bit linear back to 16-bit Log. It's similar to doing the log2lin steps in reverse, but not quite. So, starting with a good looking 32-bit linear image...
1) Use the
Cineon Converter to apply a lin2log operation to each layer. Typically you'll use the default settings, but switch the conversion to
lin2log. After you do this, your image will look bright and washed out because it's been converted to Log space but is still getting the gamma correction Photoshop does to all 32-bit images. Don't worry.
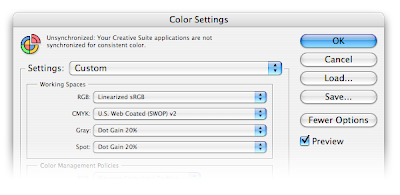
2) Here's the tricky part. We have to convert back to 16-bit without Photoshop changing any pixels. During this mode switch, Photoshop converts your linear 32-bit image into whatever color space is set as your default RGB working space. So you have to go into the
Color Settings dialog and temporarily change that to the
linear color profile you've previously created.

3) Now change the
image mode from 32-bit to 16-bit. Thanks to the previous steps, your pixels will now be in 16-bit Log space. When asked about Exposure and Gamma, leave those values untouched (0.0 exposure and 1.0 gamma). The image will not look any different (which is always the preferred behavior for switching image modes) and the pixels will not change values because of that linear profile.
3.5) You probably don't want a linear profile as the default working space, so change your
Color Settings back to their original values, usually with
sRGB as the default RGB working space. You probably notice this is kind of a pain - all the more reason to script it via JavaScript and Actions.
4) Open the
Assign Profile dialog and assign a better profile to this image. If you apply sRGB (or tell Photoshop not the manage the document), you will see the image in Log space. You may also choose another profile to do some sort of film preview, such as the Theater Preview profiles that ship with After Effects.
And that's it. You should be able to start with a 16-bit Log file, use the
various steps to convert it to 32-bit linear, use these steps to convert it back to 16-bit log and arrive at exactly the same image you started with, which is always an important test for any color pipeline.
For the record, you're not crazy if you have a 32-bit linear workflow but want to paint in log space. For one thing, many of Photoshop's tools aren't available in 32-bit (hello, Curves?!?). And some of the tools that are in 32-bit have not been appropriately tweaked for linear (I'm looking at you, Levels). Finally, if you have some film preview profiles, Photoshop can't use them in 32-bit mode like After Effects can.
So by painting in Log, you 1) reclaim some of your favorite tools, 2) can use film preview profiles, and 3) can still paint overbrights because 100% white in log space maps to 13.52 in linear. But be careful! Realize that layers will composite in Log space differently than in linear space, especially if you have soft feathered edges or use transfer modes such as Screen. If you flatten your layers before converting to 32-bit this won't be a problem, but if you need the layers to be separate, make sure you test everything first.

